
So far, Swift has been welcomed by developers and has generated a lot of articles in popular platforms like Stack Overflow. The aim of this article is to contribute to the growing popularity of the language with some sample code to connect, subscribe and send messages to Lightstreamer.
The code presented here has been written and tested with Xcode 6.0 beta3 and the Lightstreamer iOS client 1.3 (due to be released shortly), but it is compatible with client version 1.2.x (released with Server 5.x).
If you prefer a complete example, in place of a step by step tutorial, take a look at the iOS Swift Chat demo. More informations at the end of the article.
If you prefer a complete example, in place of a step by step tutorial, take a look at the iOS Swift Chat demo. More informations at the end of the article.
Preparing the Project
Of course the Lightstreamer iOS client library is written in Objective-C. To be used with Swift it requires a "bridging header", a special .h file that imports whatever of Objective-C is going to be used inside Swift sources. The simplest way to create it is adding a fake .m and let Xcode propose to you its creation. In this way you will be sure the header file and its path are correctly set up in the build settings.
So, once you have create a new project with Swift as a language, add a Test.m file and press Yes on this dialog:

Once done, you can safely delete you Test.m file.
Now import the Lightstreamer iOS client library in your project, like you would have done with Objective-C (e.g. by dragging its lib and include directories in your project), and make sure the libLightstreamer_iOS_client_64.a file is in the Link Binary with Libraries section of your Build Phases tab. Since Swift is supported by iOS 7 and above, you can safely use the combined 32/64 bit version of our client library.
In the Link Binary with Libraries section also add the System Configuration framework, as it is needed by the client library to monitor network reachability. Once done, your project should look something like this:

Note the bridging header and the imported headers and libraries in the Project Navigator, and the two libraries in the Build Phases panel. If you are using a 1.2.x version of the client library you will see fewer headers under the include group. That's normal since 1.3 introduces new objects for mobile push notifications.
Finally, go back to editing the bridging header added before, and add an #import statement for the client library:
//
// Use this file to import your target's public headers that you would like to expose to Swift.
//
#import "LightstreamerClient.h"
Your project should now build with no errors.
Connecting to Lightstreamer
First of all, make sure we have a background queue we can use for blocking tasks, like connecting. So, let's add to our view controller a concurrent GCD queue:
class ViewController: UIViewController {
let _queue = dispatch_queue_create("SwiftTest Background Queue", DISPATCH_QUEUE_CONCURRENT)
Note that Swift introduces two statements for creating variables and instance variables: var and let. While the former creates a common variable, the latter creates a constant, i.e. a variable that can't be changed (and if it is a collection it's immutable). It is the equivalent of final with Java. The compiler can apply important optimizations when it knows an object can't be changed, so choose your statement appropriately. In this case, we are not going to change our background queue, so we can use let.
Now let's create our LSClient instance and our connection infos instance, again both as constants:
let _client = LSClient()
let _connectionInfo = LSConnectionInfo(pushServerURL: "http://push.lightstreamer.com", pushServerControlURL: nil, user: nil, password: nil, adapter: "DEMO")
Here we connect to the online Lightstreamer demo server, but feel free to put whatever host or adapter set you need to connect to.
We see here how the Swift language copes with the peculiar method names of Objective-C: arguments must be named. The editor will help you by proposing the correct syntax, and if you forget to name an argument it is usually able to suggest the correction:

Before we can actually connect, we need to implement the LSConnectionDelegate protocol. So change the declaration of the view controller accordingly:
class ViewController: UIViewController, LSConnectionDelegate {
and add an empty implementation for the 4 basic connection events:
//////////////////////////////////////////////////////////////////////////
// Methods of LSConnectionDelegate
func clientConnection(client: LSClient!, didStartSessionWithPolling polling: Bool) {
NSLog("Connection established (polling: \(polling))")
}
func clientConnection(client: LSClient!, didEndWithCause cause: Int) {
NSLog("Connection ended")
}
func clientConnection(client: LSClient!, didReceiveConnectionFailure failure: LSPushConnectionException!) {
NSLog("Connection failed with reason \"\(failure.reason)\", reconnecting automatically...")
}
func clientConnection(client: LSClient!, didReceiveServerFailure failure: LSPushServerException!) {
NSLog("Connection failed with reason \"\(failure.reason)\", reconnecting automatically...")
}
Unfortunately, Swift misses the #pragma mark directive that I found so useful with Objective-C, so we revert to old style comments to split the source code in segments. There are rumors that something similar to a #pragma mark will be added in the future.
In the code above you can also see the new Swift string composition: if in the middle of a string you put a backslash-parenthesis pattern, you can follow it with any language expression and the compiler will appropriately format the result. Quite practical (and, as such, typically Apple).
Finally, let's add the actual connection code in the viewWillAppear event:
//////////////////////////////////////////////////////////////////////////
// Methods of UIViewController
override func viewWillAppear(animated: Bool) {
NSLog("Connecting...")
// Start LS connection in background
dispatch_async(_queue) {
self._client.openConnectionWithInfo(self._connectionInfo, delegate: self)
}
}
Now run your project and you will (hopefully) see:
2014-07-11 16:28:59.063 SwiftTest[4512:564540] Connecting...
2014-07-11 16:28:59.736 SwiftTest[4512:564633] Connection established (polling: false)
First step: done.
Before the next step, recall that connection monitoring with Lightstreamer can be tricky, especially on a mobile device that can be subject to frequent network instability. Keep in mind the following 6 points:
- the right time to subscribe is when a session is started (i.e. on clientConnection:didStartSessionWithPolling: event);
- subscribe only if you haven't previously done so, as subscriptions are automatically resubmitted in case of a connection drop and subsequent reconnection (you can use the table key obtained from the subscription method, or a flag of your own, to know if you have already subscribed or not);
- the client will stop reconnecting automatically only when the server ends the session on purpose (i.e. on clientConnection:didEndWithCause: event); if this happens, you have to reconnect manually, and your subscriptions must be resubmitted;
- some operations require an active session or will throw an exception (which can't be caught with Swift, more on this later); check the connected property of your LSClient instance before a subscription or sending a message, to know if there's an active session in that very moment;
- use connection failure events to update your UI state (i.e. clientConnection:didReceiveConnectionFailure: and clientConnection:didReceiveServerFailure: events), if you need to provide the user a feedback on the connection status; remember that these events are not final states, the client will reconnect automatically;
- never ever ever start lengthy/blocking operations during connection events (or any other event), as you will delay subsequent events and, with libraries pre 1.2.6 and pre 1.3 alpha3, may even cause deadlocks and disconnections.
All this is stated in the library's API docs, but repetita iuvant, as my Roman ancestors were used to say.
Subscribing
Let's follow the first 2 points of the above 6:
- keep a memory of our subscription state with an instance variable, and
- subscribe when the session is started, but only if we haven't yet done so.
Let's add an optional LSSubscribedTableKey to our view controller:
var _tableKey: LSSubscribedTableKey? = nil
This time it is a variable, as it will change during our run time, and it is optional, as it is initially null. Optionals are one of the strongest changes between Objective-C and Swift, as the former will completely ignore null pointers, while the latter will come to great lengths to enforce pointer checking. More on this later.
Before we can actually subscribe, we need to implement the LSTableDelegate protocol. So modify the view controller declaration accordingly:
class ViewController: UIViewController, LSConnectionDelegate, LSTableDelegate {
and add an empty implementation for the table:itemPosition:itemName:didUpdateWithInfo: and table:didEndSnapshotForItemPosition:itemName: events:
//////////////////////////////////////////////////////////////////////////
// Methods of LSTableDelegate
func table(tableKey: LSSubscribedTableKey!, itemPosition: CInt, itemName: String?, didUpdateWithInfo updateInfo: LSUpdateInfo!) {
NSLog("Received update for item named \(itemName!)")
}
func table(tableKey: LSSubscribedTableKey, didEndSnapshotForItemPosition itemPosition:Int, itemName: String) {
NSLog("Snapshot ended")
}
Now we can add our actual subscription in the clientConnection:didStartSessionWithPolling: event:
func clientConnection(client: LSClient!, didStartSessionWithPolling polling: Bool) {
NSLog("Connection established (polling: \(polling)), subscribing...")
// Subscribe to chat adapter, if not already subscribed
if !_tableKey {
let tableInfo = LSExtendedTableInfo(items: ["chat_room"], mode: LSModeDistinct, fields: ["message", "timestamp", "IP"], dataAdapter: "CHAT_ROOM", snapshot: true)
_tableKey = _client.subscribeTableWithExtendedInfo(tableInfo, delegate: self, useCommandLogic: false)
}
}
The item and fields subscribed here are those of the demo chat room. As introduced before, we use the table key as a memory of a previous subscription. If we didn't keep a memory and subscribed tout court, each time the library reconnected we would add a new subscription to previous ones. In this way we could accumulate 5, 10 or more subscriptions, each one sending its own snapshot, leading the app to a mess of events and eventually to a stall or a memory warning.
Before running the project, let's follow also point 3 of the 6 above. That is, if the connection is ended on purpose, we have to clear the subscription memory and reconnect manually:
func clientConnection(client: LSClient!, didEndWithCause cause: Int) {
NSLog("Connection ended, reconnecting...")
// Clear subscription status
_tableKey = nil
// Restart LS connection in background
dispatch_async(_queue) {
self._client.openConnectionWithInfo(self._connectionInfo, delegate: self)
}
}
Finally, we can also add a bit more of code to the table:itemPosition:itemName:didUpdateWithInfo: and extract some content from the updates:
func table(tableKey: LSSubscribedTableKey!, itemPosition: CInt, itemName: String?, didUpdateWithInfo updateInfo: LSUpdateInfo!) {
let message = updateInfo.currentValueOfFieldName("message")
let timestamp = updateInfo.currentValueOfFieldName("timestamp")
let address = updateInfo.currentValueOfFieldName("IP")
if !message || !timestamp || !address {
NSLog("Discarding incomplete message")
return
}
NSLog("Received message from \(address!) at \(timestamp!)")
}
Recall that optionals are not pointers: here message, timestamp and address are string optionals, as they could be null, and as such they can't be used in a string composition (or in any other API that requires a string). They must be unwrapped first, which is what that little exclamation mark does.
Now run your project and you should see something like this:
2014-07-11 17:43:32.887 SwiftTest[5086:680572] Connecting...
2014-07-11 17:43:33.401 SwiftTest[5086:680676] Connection established (polling: false), subscribing...
2014-07-11 17:43:33.959 SwiftTest[5086:680621] Received message from 151.42.203.37 at 17:41:13
2014-07-11 17:43:33.960 SwiftTest[5086:680621] Received message from 151.42.203.37 at 17:41:13
[...]
2014-07-11 17:43:33.964 SwiftTest[5086:680621] Received message from 70.178.242.178 at 03:48:48
2014-07-11 17:43:33.964 SwiftTest[5086:680621] Received message from 149.7.45.100 at 17:11:19
2014-07-11 17:43:33.965 SwiftTest[5086:680621] Snapshot ended
Second step: done.
One step to go.
Sending a Message
To send a message we need a way to enter it. I won't detail the passages needed to add a text field to the view, connect it to the view controller etc., as this is not a tutorial on the use of Xcode. There are already very good tutorials out there on this subject. Let's just mark a text field and a button on the view controller:
@IBOutlet var _textField: UITextField
@IBOutlet var _sendButton: UIButton
and add our message sending code on the button action method:
//////////////////////////////////////////////////////////////////////////
// Action methods
@IBAction func sendTapped() {
if !_client.connected {
NSLog("Client disconnected")
return
}
// Get the message text
let message = _textField.text
_textField.text = ""
NSLog("Sending message \"\(message)\"...")
// Send the message in background
dispatch_async(_queue) {
self._client.sendMessage("CHAT|" + message)
}
}
Note that we applied point 4 of the above 6. The prefix in the message composition is due to the way the Lightstreamer demo adapter handles messages. If you are not an experienced Lightstreamer server-side developer just trust that this will work with the online demo chat.
Third step: done.
Here we used the synchronous version of the message sending APIs, calling it on a background thread. Alternatively, we could have used the asynchronous version, which provides message serialization. In this case the code would have changed in this way:
@IBAction func sendTapped() {
if !_client.connected {
NSLog("Client disconnected")
return
}
// Get the message text
let message = _textField.text
_textField.text = ""
NSLog("Sending message \"\(message)\"...")
let messageInfo = LSMessageInfo(message: "CHAT|" + message, sequence: "CHAT_SEQUENCE")
self._client.sendMessage(messageInfo, delegate: self)
}
Where "CHAT_SEQUENCE" is a symbolic identifier used by the server to keep messages in sequence, i.e. all messages received with the same sequence identifier are kept ordered and serialized. Note that when using asynchronous messaging there's no need to call the API on a background thread, as the client library will do this for you.
The use of asynchronous messages requires also to implement the LSMessageDelegate protocol:
//////////////////////////////////////////////////////////////////////////
// Methods of LSMessageDelegate
func message(messageInfo: LSMessageInfo!, didProcessWithProgressiveNumber progressiveNumber: Int32) {
NSLog("Message \(progressiveNumber) processed")
}
func message(messageInfo: LSMessageInfo!, didAbortWithProgressiveNumber progressiveNumber: Int32, errorCode: Int32, errorMessage: String!) {
NSLog("Message \(progressiveNumber) aborted with error code \(errorCode)")
}
func message(messageInfo: LSMessageInfo!, didAbortWithProgressiveNumber progressiveNumber: Int32, exception: LSException!) {
NSLog("Message \(progressiveNumber) aborted with exception \(exception)")
}
With this last snippet, we have concluded our sample code, but there's room for some considerations.
On Objective-C vs Swift
Choosing a language or another is a matter of taste, so take what follows as my personal opinions, and not the official position of Weswit.
Optionals
What I liked in Objective-C is how it really doesn't care about null pointers. After years with Java, this seemed to me like a breath of fresh air and liberty. I was used to lines and lines of something like:
Object obj= factory.getObject();
if (obj != null) {
Object subobj= obj.getSubobject();
if (subobj != null) {
// ...
}
}
or maybe:
try {
Object obj= factory.getObject();
Object subobj= obj.getSubobject();
// ...
} catch (NullPointerException npe) {
// ...
}
Man, that was tiring. Objective-C made everything simpler: just use your pointer, if it is null nothing will happen. Nothing, not even a log line. So, code looked shorter and clearer, since ifs and trys were there just when needed, not spread everywhere like chickenpox bubbles.
Unfortunately (in my opinion), the approach of Swift is exactly the opposite. Pointers can't be null, full stop. To consider null values, you have to wrap them inside optionals. In some way they remind me the references of C++, which can't be null either. This mechanism forces the developer to introduce syntax changes each time a pointer can be null. That is: a potentially null pointer is type-checked during compilation.
So, what happens when you transport an Objective-C interface to Swift, with two such different approaches? Taking a look at how Swift wraps our client library, it seems that sometimes a pointer is mapped to an optional, and some other times it is mapped to an implicitly unwrapped optional. Consider this event, for example:
func table(tableKey: LSSubscribedTableKey!, itemPosition: CInt, itemName: String?, didUpdateWithInfo updateInfo: LSUpdateInfo!) {
We have tableKey and updateInfo which are implicitly unwrapped, while itemName is optional. This means that the compiler will check that you don't use itemName as a string without unwrapping it first, but will not do the same check for tableKey and updateInfo. If you touch an implicitly unwrapped optional with a null value, you get a runtime error. That is: a crash.
I don't know why it chose to map parameters of the same event in two different ways, maybe the book "Using Swift with Cocoa and Objective-C" explains it somewhere. But I'm betting a coffee this kind of things will make swear a lot of developers.
Exceptions
Here we have another weak point (in my opinion) of Swift: there's no structured exception handling. If an API you are using throws an exception your app crashes.
In our client library we make quite a liberal use of exceptions, as it is traditionally a good object-oriented programming pattern. But we are not the only one: even the iOS Foundation library makes use of them. Try accessing an array beyond its bounds, for example. Or try writing to a closed file. These are all situations where exceptions come in handy.
Exceptions have been introduced to avoid if-else chaining, as this was making error handling difficult and (ironically) prone to errors. How can we have a new object-oriented language in 2014 without exceptions handling? Even Javascript has them, come on!
My hope is that they will introduce them in a future release of the language. In the meantime, our client library should provide all the instruments needed to avoid exceptions preventively. For example, by checking that your LSClient instance is connected before calling a method that requires connection (as reminded at point 4 of the above 6). If you should discover cases where you can't preventively check for an exception-throwing condition, let us know.
If Apple should persist with the lack of exception handling, we are prepared to wrap some of the APIs with an alternative version that fills an NSError. This is another common error handling pattern in the iOS Foundation library, developers should find themselves at ease with it.
Synchronization
Last but not least, Swift also lacks synchronization primitives. Here, fortunately (in my opinion), we can use the low-level Objective-C APIs to fill the gap, even if it is not exactly the same.
Low-level synchronization APIs are basically two, this:
objc_sync_enter(object)
to enter a synchronized block, and this:
objc_sync_exit(object)
to exit. One could think they are equivalent to
@synchronized (object) {
// ...
}
but would be wrong, as this example shows:
objc_sync_enter(object)
if object.hasSomeCondition() {
return
} else {
// ...
}
objc_sync_exit(object)
If hasSomeCondition() is true, the synchronization lock is not freed up and your app will sooner or later enter a deadlock. The same code with the @synchronized primitive would avoid this situation, as the synchronization lock is freed up automatically. So, pay attention when you use synchronization APIs.
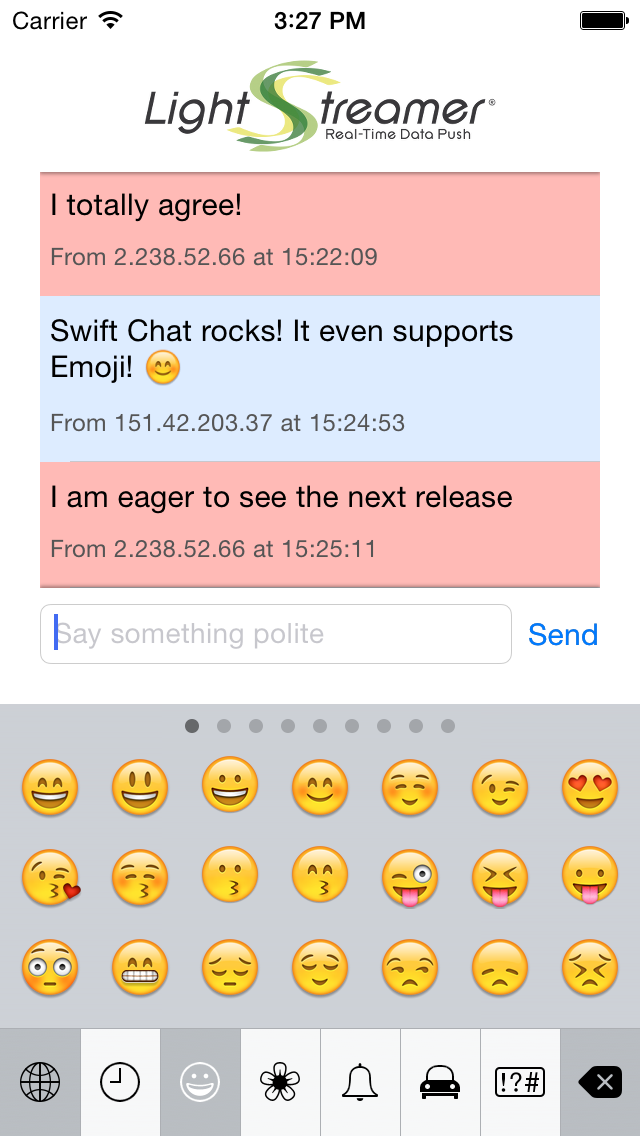
A Ready-to-Run Example: Swift Chat
We have recently released a new example on our GitHub repository: the iOS Swift Chat demo. It is a simple iPhone chat app developed with Swift, from which most of the code presented here has been taken. It is a single-view app, making use of subscription and send message APIs. Take a look for a complete project, ready to be run on your device.
Here you can see a couple of screenshots:

Conclusion
Our sample code and our new chat demo show that the Lightstreamer iOS client library is already usable with Swift, with no limitations. Anyway, besides personal opinions, remind that Swift is a work in progress. It's too early to cast final judgements as it is too early to definitely adopt it in place of Objective-C. As it happened with Objective-C and many other languages, by the time Swift reaches maturity it will be quite a different (and better) language than today.
No comments:
Post a Comment
Note: Only a member of this blog may post a comment.